


 PENCIL SKETCH EFFECT FROM ADOBE PHOTOSHOP CS3
Wednesday, February 27, 2008
Dear friends here I give you a simple tutorial to make a pencil sketch effect of a photograph by using Adobe Photoshop CS3.
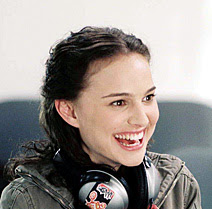
Step -1: Here I want to make a pencil sketch of the photo of Natalie Portman.


 Step-8: Go to Normal > Colour Dodge


Please visit Chan Mya soe Blog for original work here.


Portugues |
Francais |
Espanol |
Deutsche |
Italiano |
Chinese |
Korean |
Japanese
Email this post
Step -1: Here I want to make a pencil sketch of the photo of Natalie Portman.

Step -2: Click Open or Ctrl +O

Step -3: Now a popup window opens for photos. Select the photo you wish to make the pencil sketch. Click “Open”.

The image will see in the Photoshop.

Step-4: Now Go to > Layer > New > Layer via copy (duplicate) or Ctrl + J

Step – 5: Go to > Image > Adjustment > Desaturate or Ctrl + Shift + U

The image looks like this:

Step-6: Again Go to > Layer > New > Layer via copy (duplicate) or Ctrl + J

Step-7: Go to Image > Adjustments > Invert or Ctrl + I
 Step-8: Go to Normal > Colour Dodge
The image becomes:

Step 9: Go to Filter > Blur > Gaussian Blur

Step 10: A new popup window opens and adjust the radius 5 – 6 pixel or according to your requirement.

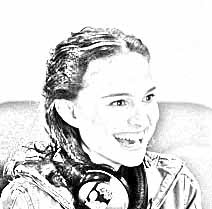
Step 11: Save the photo.

The final pencil sketch is ready now.

Please visit Chan Mya soe Blog for original work here.


0 comments: to “ PENCIL SKETCH EFFECT FROM ADOBE PHOTOSHOP CS3 ”
Post a Comment